Grafix Lesson Plan: Lesson 11
Project Description: Learn how to create grid drawings with Grafix Clear Film.


Designed by: Kirby Meng
Difficulty: Moderately Challenging
Materials:
- Grafix Chipboard
- Grafix Clear Dura-Lar Film
- Non copyrighted photo
- Extra fine permanent marker
- Drawing paper
- Ruler
- Drawing pencils
- Eraser
- Blending stump or tissue for blending
Steps to Make This:
- Find the photograph, measure it including only the image area and write the measurements down. Do not measure any borders.
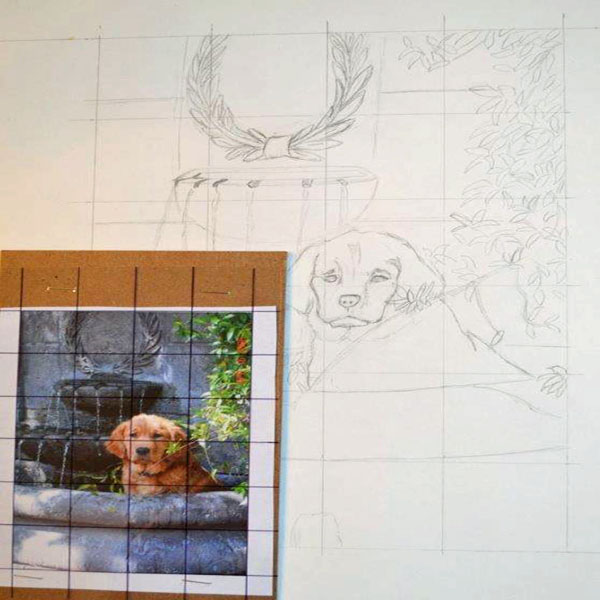
- Tape the photo to a piece of Grafix Chipboard and cover with a piece of Dura-Lar Clear Film cut slightly larger than the photo, so that you can staple it through the film and the chipboard only.
- Grid the photograph in 1″ increments using a permanent marker. Use a ruler and measure carefully, it will affect the final project.
- Determine how many times you are going to enlarge the photo based on the size of paper. Leave a border around your work in case you decide later to mat or frame the work. If you are working from a 3″ x 5″ or 4″ x 6″ photo you will probably enlarge by 2 or 3.
- After the calculations mark your border on the paper and create the rectangle where you will complete your drawing.
- Next mark the squares on the drawing paper. If you enlarged by 2, you will use 2″ squares on the drawing paper. Enlarged by 3, you will use 3″ squares on the drawing paper, etc. Measure across the top and bottom and connect the marks. Repeat for the sides. Draw these lines VERY lightly as you will erase them later and not want them to show up. You should be creating even squares, if you have rectangles, something is not right, re-measure and try again.
- Be sure you have the same number of squares on the drawing as you do on the photograph.
- Begin by drawing what is in each square on the photo into the corresponding square on the drawing. The lines will not be the same size because you are enlarging, but they will be proportional. Continue until the entire picture is drawn. Do not add value as you go.
- Once the drawing is complete, erase your grid lines.
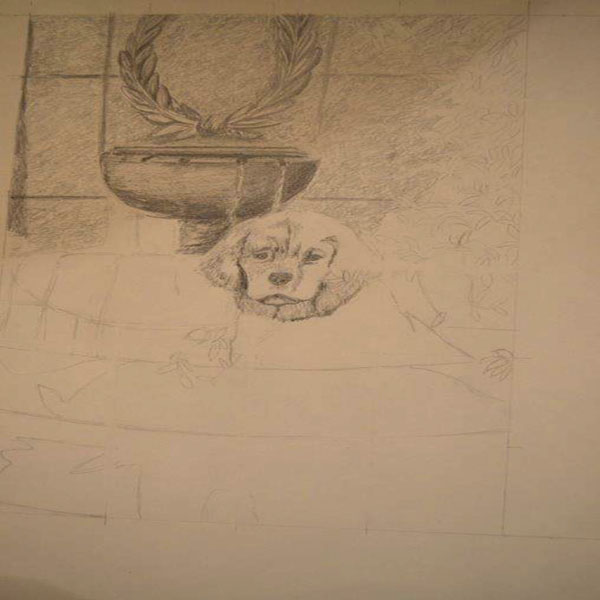
- Begin shading using 10 values from white, no graphite, to the darkest your pencil will shade. Use a blending stump, a piece of tissue or paper towel to blend values together so you don’t create lines of value. Don’t blend with your fingers, the oils will affect the paper’s ability to hold the graphite.
- Your picture is complete once you have shaded all areas of the drawing.
Tips: When choosing a picture, look for a good subject that is clear, in focus and has a wide range of values. Avoid using published photos, they are most likely copyrighted. If you have snapshots from vacation, etc. it is fine to use these, just make sure that the subject is close, clear, in focus and there is not a lot of distracting background. You can also use the grid