How to Make Grafix Inkjet Shrink Film Magnet Photo Decor
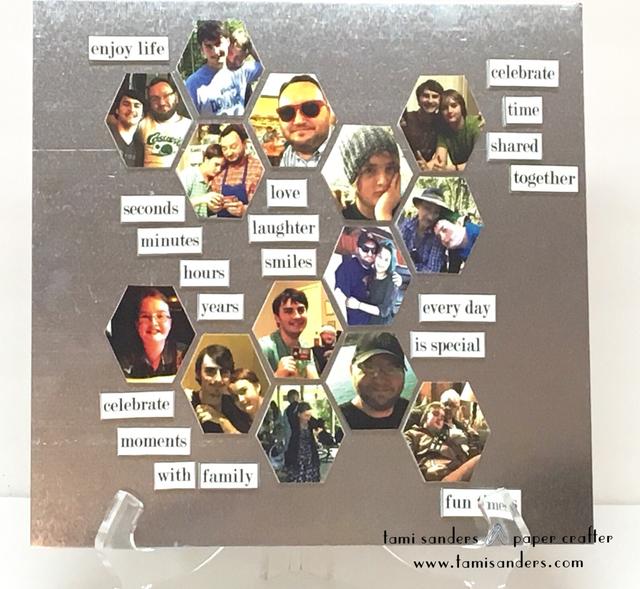
Project Description: Grafix Inkjet Printable Shrink Film was used to create hexagon-shaped, magnetic photo tiles that can be arranged and rearranged on a metal backboard. Word tiles can be added to personalize your piece.

Designed by: Tami Sanders
Difficulty: Easy
Materials:
- Grafix White Inkjet Shrink Film
- MD Building Products: 12 X 12 Metal Sheet
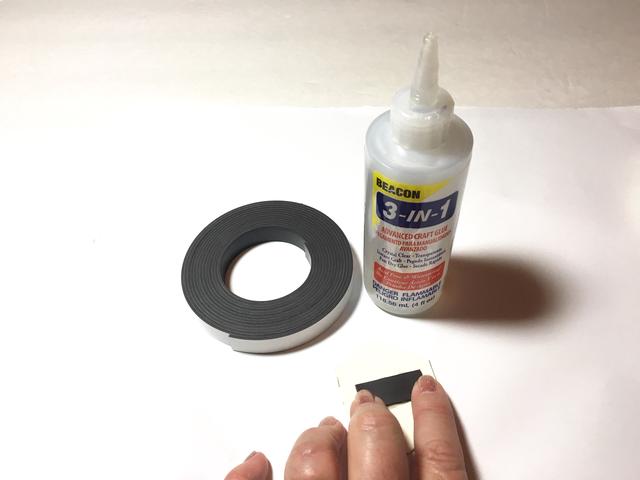
- Beacon Adhesives: 3-in-1 Glue
- Magnetic Strip
- Scissors
Steps to Make This:
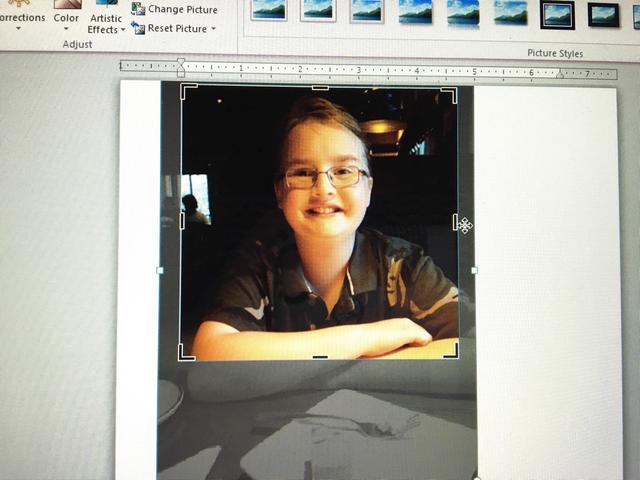
- Open a new document in your word processing program, insert a photo, and crop the photo to a square.
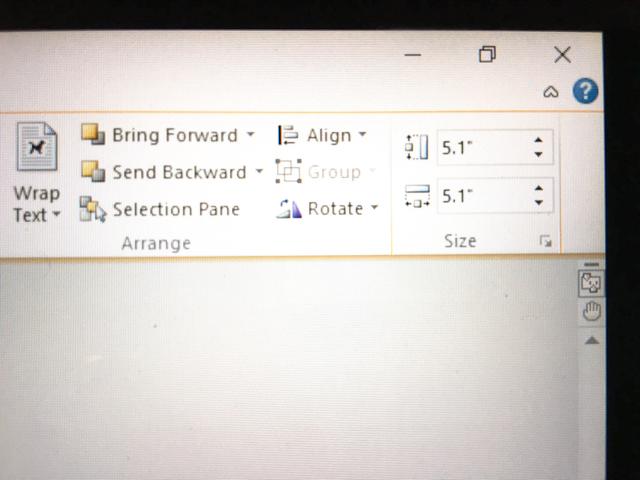
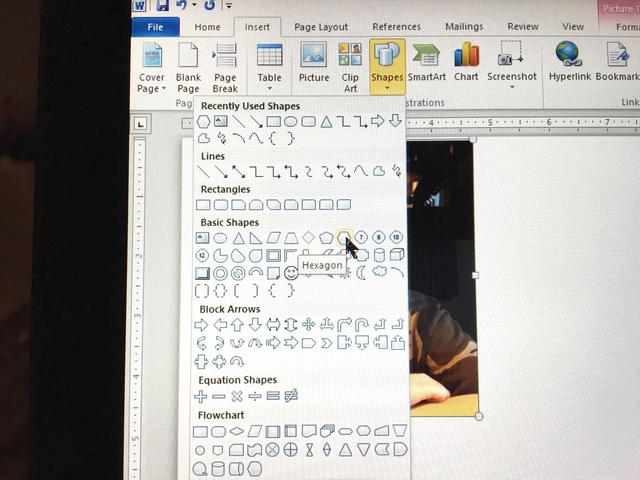
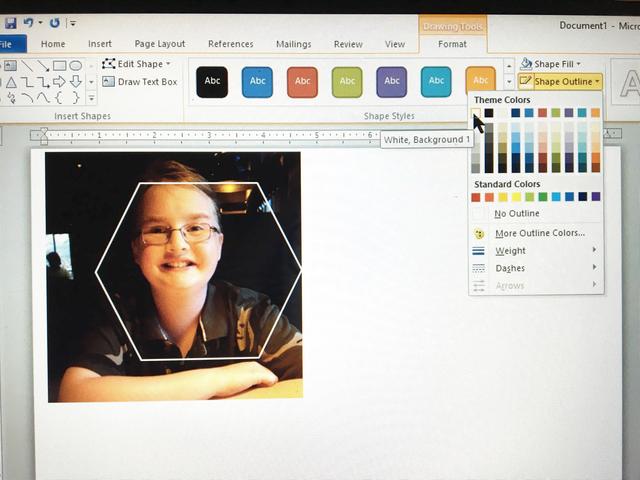
- Set the size to 5.1″ X 5.1″ and insert a hexagon shape, make sure to set the shape to “no fill”.
- Change the color as needed to see it in the photo.
- Set hexagon shape to 4.8″ X 4.8″.
- Make sure the photo is centered as desired in a hexagon shape.
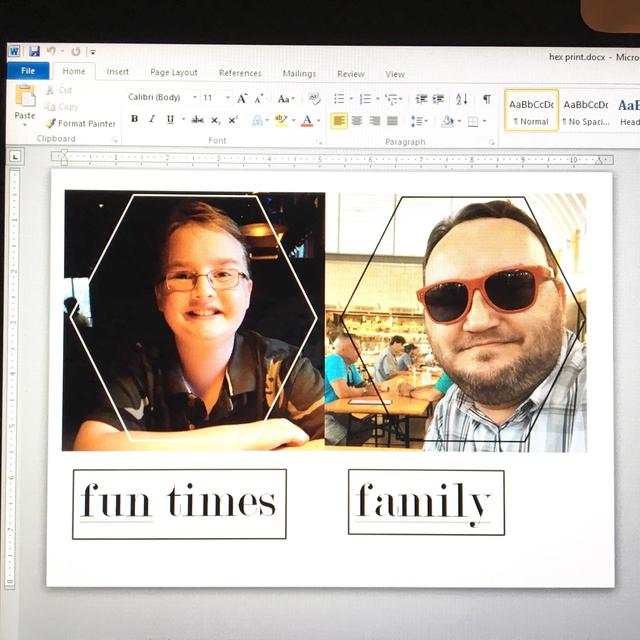
- Insert another photo and crop as before. Copy and paste hexagon and arrange to center on the new photo, changing shape color if needed.
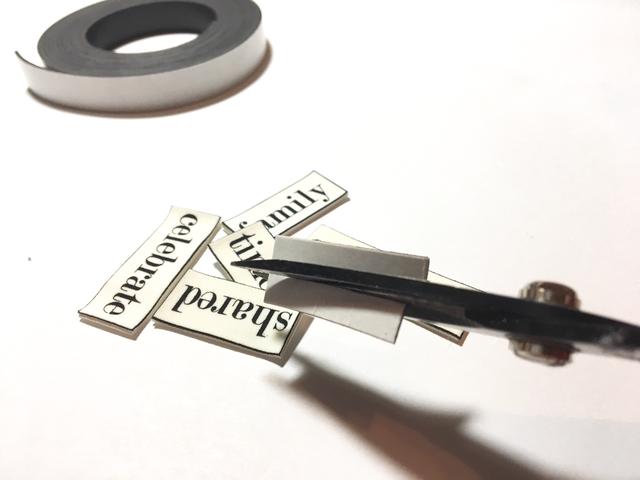
- Don’t waste space on your Shrink Film sheets! Add text boxes and inserted family-oriented words and phrases.
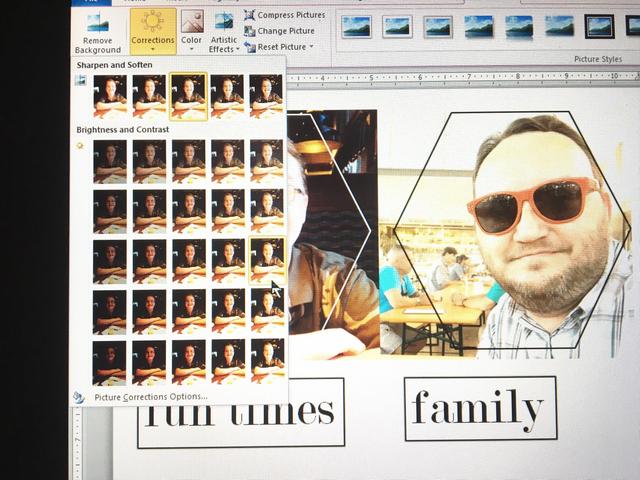
- The colors of your photos will darken and intensify after shrinking, so adjust brightness and saturation to lighten them.
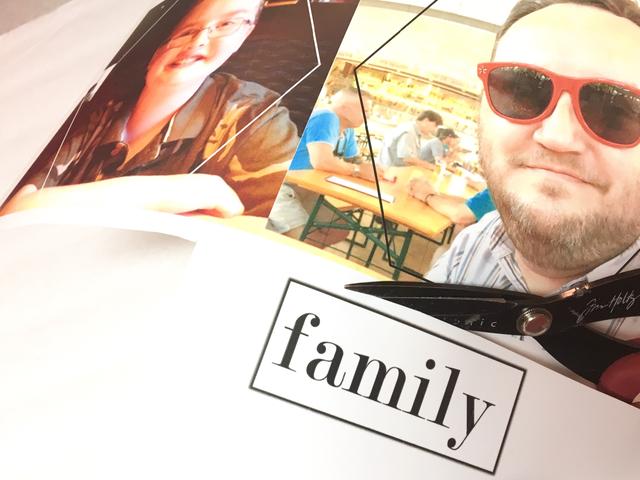
- Print out your photos on White Shrink Film.
- Cut photos just inside printed lines, cut words out just outside the lines.
- Place cut pieces on a parchment-lined baking sheet and bake according to package directions.
- Compare the size and color of pieces before and after baking.
- The adhesive on the back of the magnetic strip did not adhere well to the textured surface of the pieces; you can try using 3-in-1 Glue for a better hold.
- Cut pieces of the magnetic strip in half lengthwise to use for the words.
- Arrange photo magnets and group words on the metal sheet as you wish. You can add or change out photos and words, or just rearrange them as you like.