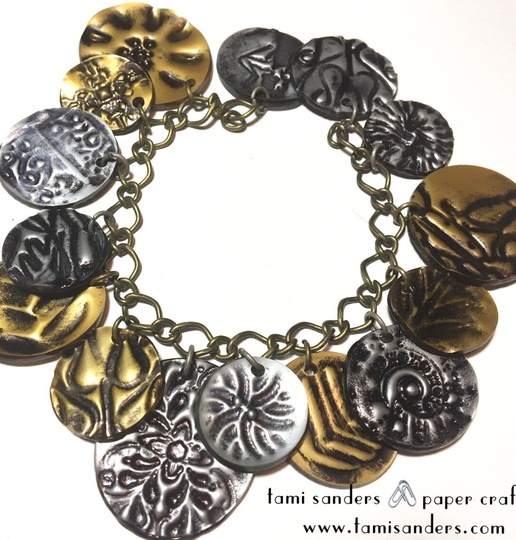
Metallic Grafix Shrink Film Charm Bracelet
Project Description: Use Grafix Gold and Silver Shrink Film to impress designs and patterns for unique charms. These metallic films are PERFECT for earrings, as they give the look of metal without the weight.

Designed by: Tami Sanders
Difficulty: Moderately Challenging
Materials:
- Grafix Gold and Silver Metallic Shrink Film
- Clearsnap ColorBox Stylus and Tips
- Clearsnap Surfacez Refill Bottle Black
- Junk Jewelry, metal buttons, hardware, etc.
- 6 mm Gold and Silver Jump Rings
- 7”- 8” of Chain for Bracelet
- Closure Finding
- 3”, 2 ½” and 2” Circle Punch
- Hole Punch
- Jewelry Pliers
- Baking Sheet
- Silpat Sheet or Parchment Paper
- Hot Pad
- Magic Eraser
- Paper Towels
Steps to Make This:
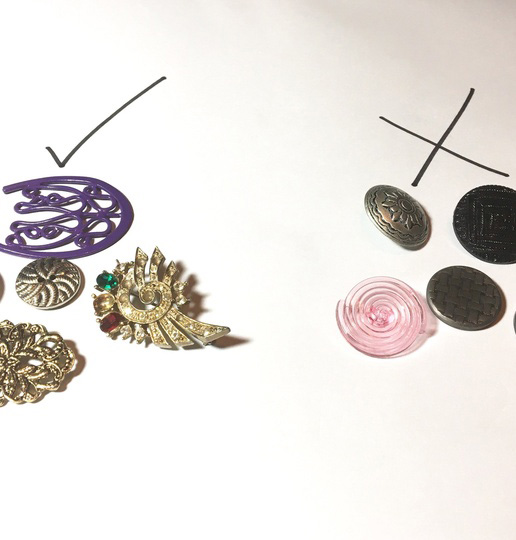
- Search through your junk jewelry or buttons to find pieces to impress in the Shrink Film. You can also use other items; look around your house to see what you might find. Some items make a better design than others. A few things to keep in mind: metal works best, deeply impressed designs transfer better, very intricate, tiny patterns may not work.
- You can experiment to find pieces that press well or play with placement on the Film. But if you don’t like the pattern you get, just reheat the Shrink Plastic for 4-5 minutes to “clear” it and try again.
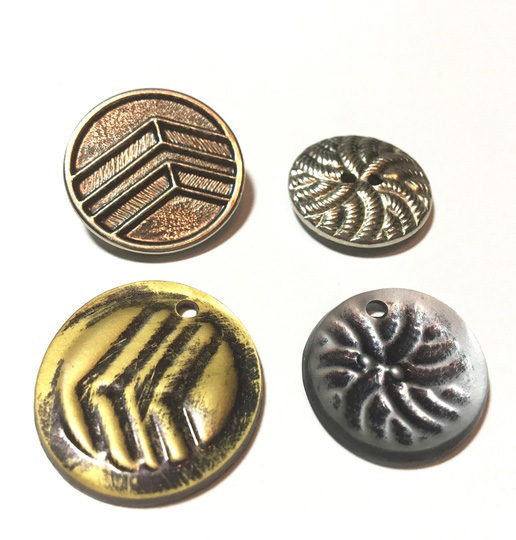
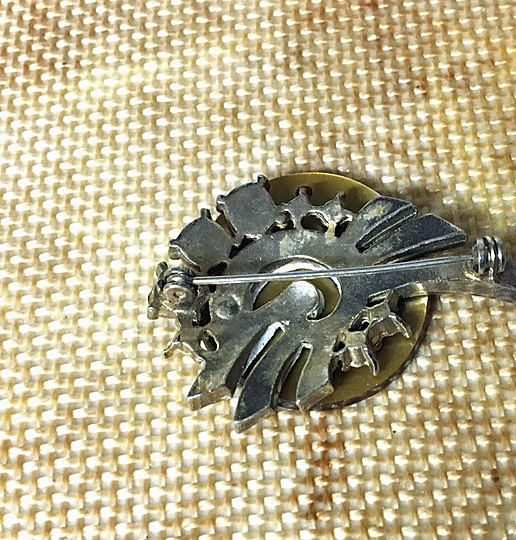
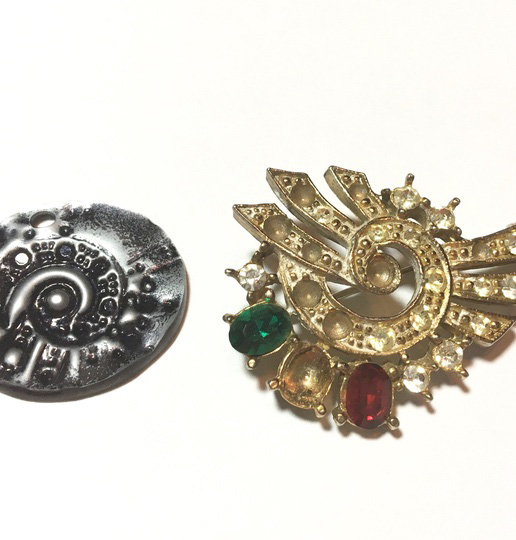
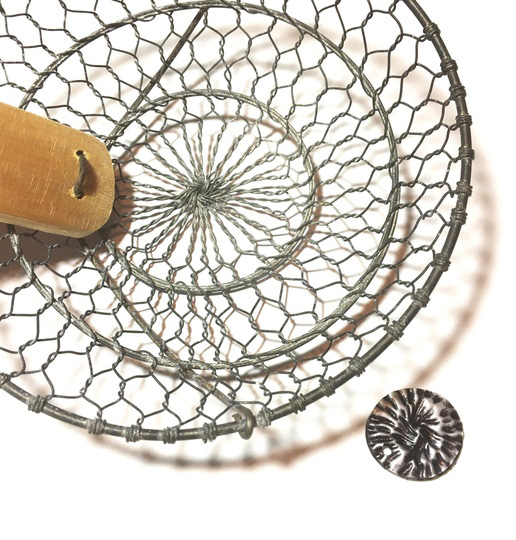
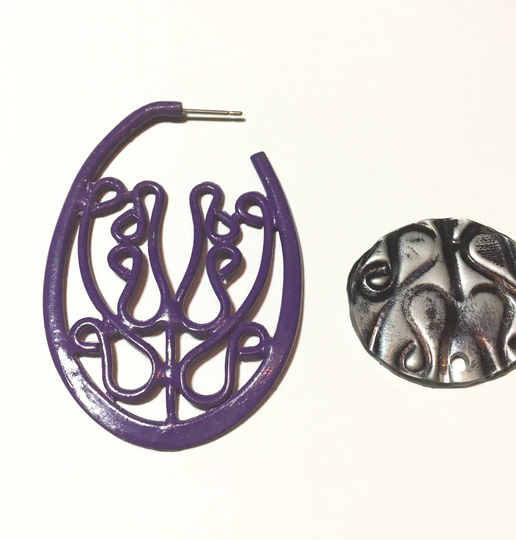
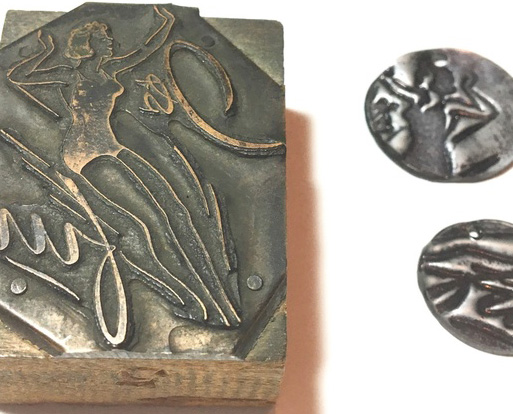
- To give you some idea of items that stamped a nice impression on the Shrink Film, to the right are a few photos of finished charms and the item used to stamp them. (Metal earring: had open, interesting design. Junk jewelry pin: prongs and missing stones only added to the design detail. Metal buttons: surfaces were flat; the design was simple and deep enough to stamp a clear impression. The bottom of my kitchen spider created an interesting design).
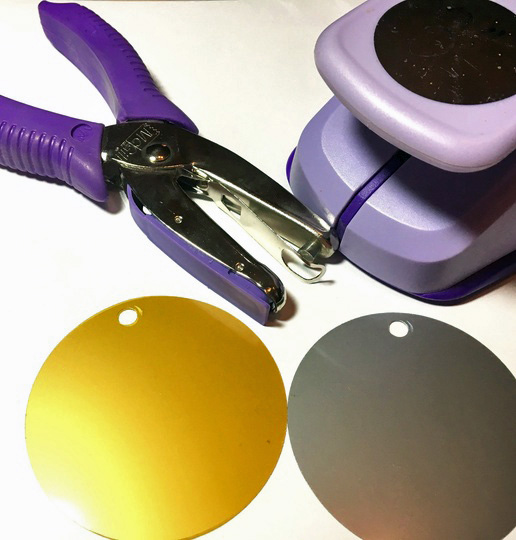
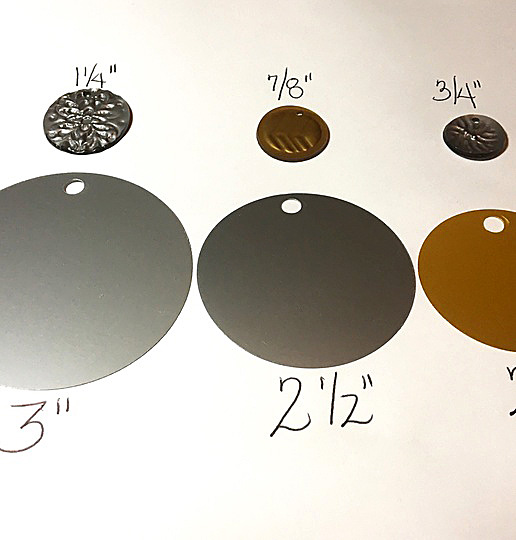
- To make charms, start by punching circles from Gold & Silver Shrink Film, and punch a hole at the top. Be sure you use at least a 1/4″ hole Punch as the hole will shrink considerably.
- The size of the circle you use will be determined by the approximate size of the item you are impressing in it unless you are using a very large item to stamp the Shrink Film. See chart in the photo.
- Place punched Shrink Film on a baking sheet, I used a Silpat sheet to line mine as I wanted the texture of it to transfer to the back of my charms. You can also line with parchment. Bake 1 at a time.
- Bake according to package directions. When a piece has shrunk, remove the tray from the oven and immediately position your junk jewelry, button, etc. over the charm. Work quickly to complete the next steps.
- Cover with an old hot pad. Then press down firmly all over the piece to transfer the pattern completely to the hot Shrink Film. The charm will cool off fast, so work quickly. Reheat if the charm cools before you can impress.
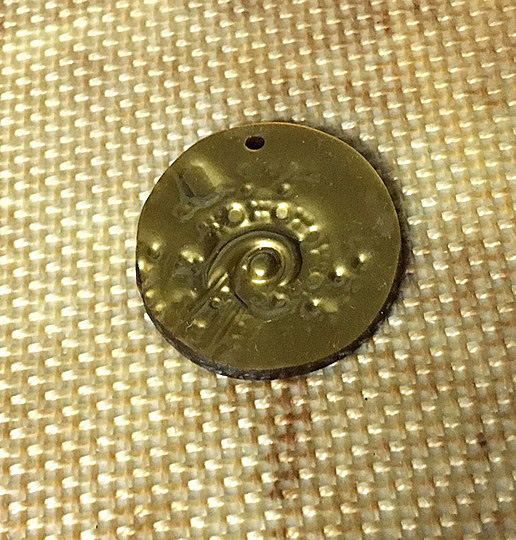
- Charm stamped with a pattern from a junk jewelry piece.
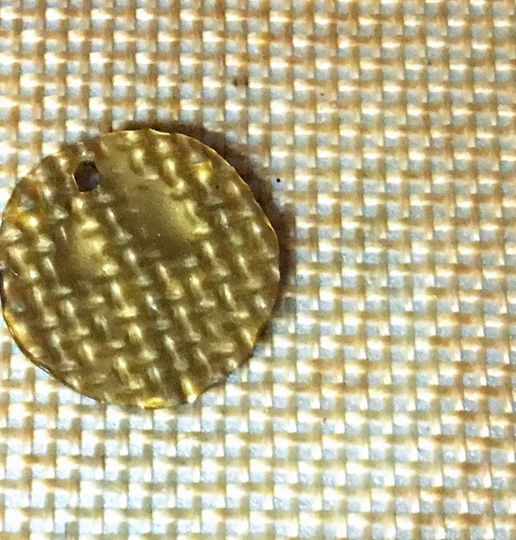
- Here is a look at the back of the charm; it has picked up the pattern from the Silpat sheet. Set charms aside to cool completely.
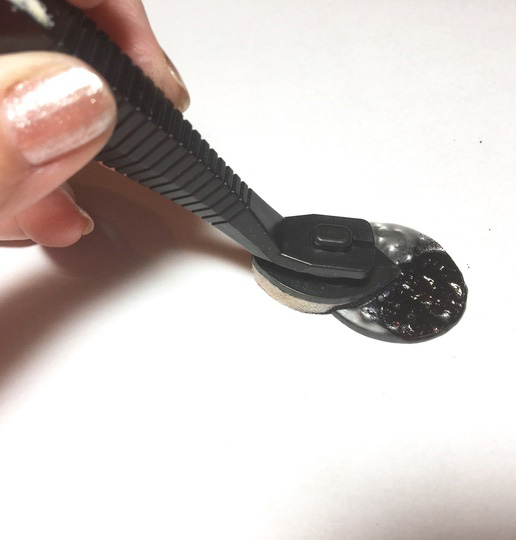
- To antique the charms and bring out the designs, squeeze a few drops of Surfacez Black Ink onto a pad of ColorBox Tip. Use a dabbing motion to press Ink into the stamped design on your charm.
- I’ve inked the bottom half of this charm, note how the ink is deep in the impressions, not just run across the top of the charm as in the top left of this charm.
- Next, use the damp magic eraser to remove ink from the top surface of the charm. Do not press hard, you want to leave the Ink in the impressions.
- Next, rub the charm in a paper towel to remove excess ink or residue from the magic eraser. Viola! An antiqued charm!
- Don’t forget to do the back of the charms if you baked on a liner that transferred a pattern.
- Use chain and jump rings that match the color of your finished charms.
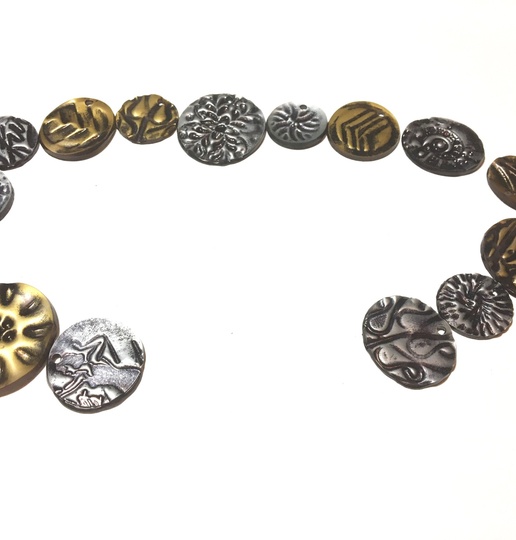
- Layout the charms in the order you want them on your bracelet. I found it looked more interesting to not just alternate gold and silver. I tried to mix up sizes and patterns.
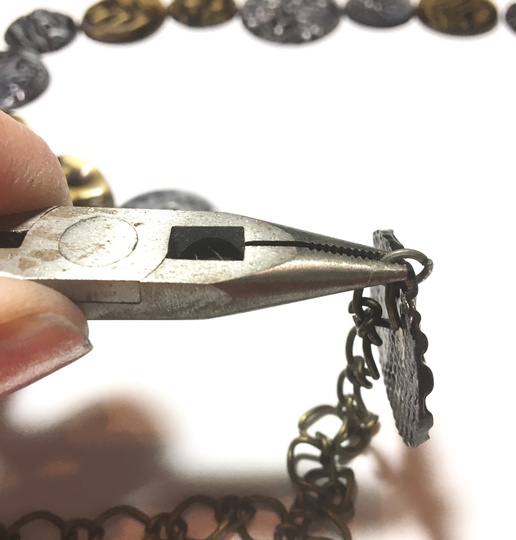
- Measure out the desired length of chain for your bracelet – remember finding will add a bit to the overall length. Then begin attaching charms using jump rings that match the charms’ color.
- Be sure you are attaching charms to the same “side” of the chain, as shown here. I placed my charms on the bottom. Also, make sure they all face the same way. Spacing will depend on your chain.
- Once all charms have been attached, add closure finding to each end to complete.
- Finished charm bracelet.