Paperless Album
Project Description: Here’s a challenge for you: try creating a mini album without using any paper. A clear, paperless album is unique and modern.

Designed by: Maureen Wilson
Difficulty: Moderately Challenging
Materials:
- Grafix Clear Film for Ink Jet
- Grafix Matte Adhesive Film for Ink Jet
- Grafix Craft Plastic
- PDF Backgrounds (click here to print)
- Rub-ons
- Binder rings or key rings
- Printer
- Hole punch
NOTE: I’m using two types of transparency sheets for this. Both are archival-quality, making them a good choice for scrapbooks. The first is the type you’re probably familiar with– clear and non-adhesive. One side is slightly rough, and that’s the side you want to print on.
The other kind has a matte finish and is self-adhesive. The finish is very similar to vellum. When you take it out of the package, you’ll notice that one side has a paper backing. You’ll want to print on the opposite side, which is smooth.
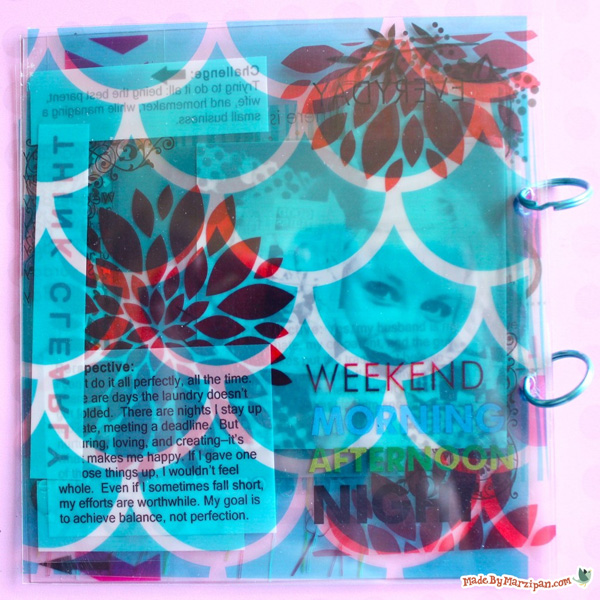
I’ve put together a printable PDF of the backgrounds and titles I used for this project. The 7×7 inch backgrounds are created from a free font made by EmilyLimeDesigns. You can print the backgrounds I made, or download this Peoni Patterns font from dafont.com and create your own.
Steps to Make This:
- Print the background on Clear Film. Change your printer paper setting to “transparency,” if available. If your printer is temperamental, add the sheets to the feed tray one at a time to avoid jamming. Avoid handling the inked portion of the paper until it is fully dry because it might smear. The wait time for this may vary depending on your printer and the paper type– the matte paper took longer to dry than the clear transparency paper.
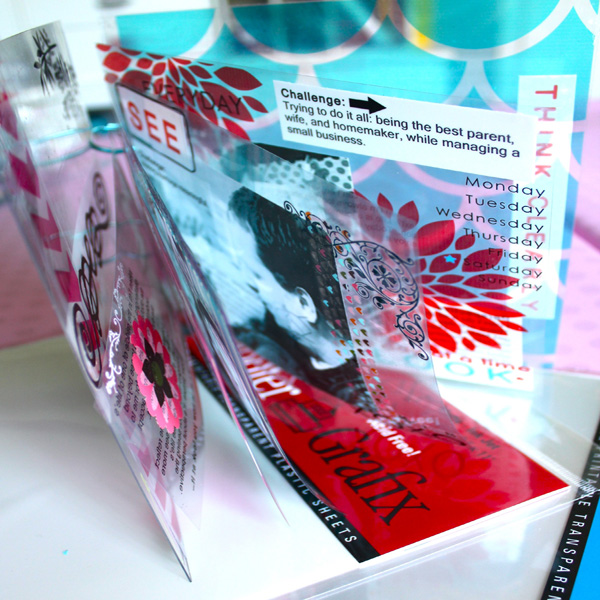
- Now that you have your transparencies printed, it’s time to make the pages into an album. I want each background to stand out, so I’m varying the size of my pages. The last page will be the full 7×7 inches, but each of the previous pages will be 1 inch shorter than the one before it. A paper cutter will help you achieve straight edges and precise measurements.
- I’m also using pieces of clear Craft Plastic as my covers. This stiff plastic is also archival quality, and it will make the album more durable. I cut these to 7 x 7 inches.
- Layer your album together, aligning at the left side. Pick up the stack, and punch two holes on the left of your album. Make sure that both holes go through all layers. I’m using a Crop-A-Dile for this, which is a strong hole punch.
- Add binder clips or key rings to secure your pages.
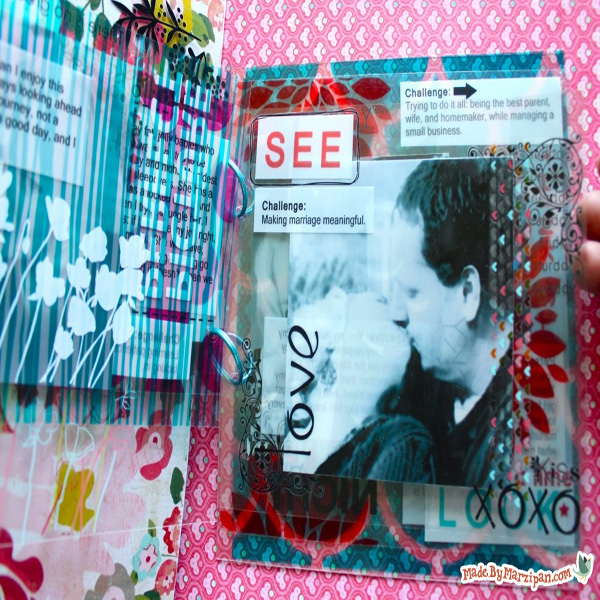
- I printed my photos and text on the Matte Adhesive Film. Cut out your photos and text. Peel the paper backing off the self-adhesive matte paper. (If you’ve worked with clear plastic or transparencies while scrapbooking, you know the trickiest part is trying to hide the adhesive; it always shows through. That’s why I love the self-adhesive backing on these sheets!)
- Add to your album. To avoid unnecessary fingerprints on your photos and text, flip to the back of the page and rub gently from that side to adhere well.
- As you place photos, texts, and titles, think carefully about the placement of each. What will show through from the front of the album? From the previous pages, and the following ones? A clear album must be designed as a whole, and not as individual pages. Flip back and forth frequently to take stock of the overall effect.
- Rub-ons look fantastic with clear albums. I’m using a random assortment from my stash, all leftover from other projects. Be aware that some types of rub-ons are colored front and back, while others have a white back. For a clear album, rub-ons that are colored on both sides are best.
If you’ve never used rub-ons before, it’s easy to do. Just cut out the image you want and remove the waxy backing. Burnish the image with a stick to adhere it to your surface. When you’re done, remove the plastic very slowly to be sure that all pieces of the image have adhered; if they haven’t, just rub again in that spot. Again, note how the placement of each image affects the overall composition of the album.