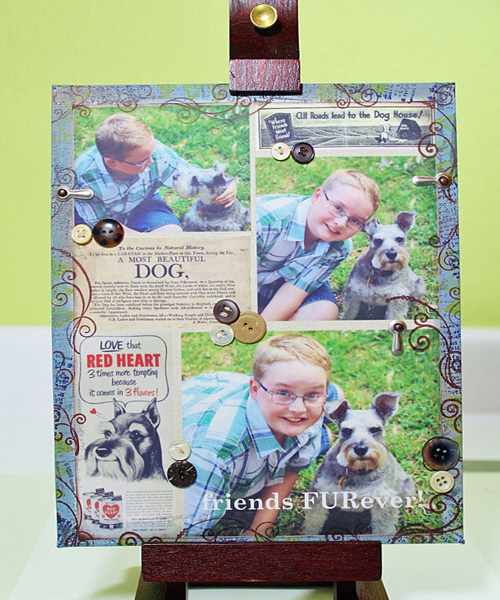
Altered Canvas
Project Description: Learn how to alter a canvas to create a custom collage to display using Computer Grafix.
Designed by: Tami Sanders
Difficulty: Moderately Challenging
Materials:
- Computer Grafix Matte Adhesive Backed Inkjet
- Clearsnap: Mix’d Media Inx” Mossy, Leather, Patina, Denim, Stormy, and Indigo, ColorBox Stylus & Tips and Color Blender
- Hampton Art: 7 Gypsies: Distressed Words, Weathered Background, and Harlequin Background Wood Stamps
- Artemio: 10001176- Clear Swirl Stamps
- Michael’s: Artist Loft: 8 x 10 Canvas
- Beacon: 3-in-1 Glue, Crop-o-dile, or Anywhere Punch
- Vintage buttons
- Scissors
- Heat Gun
Note: Be careful to keep the heat gun moving from area to area and at least 3” from your project to avoid lifting or warping the matte film.
Steps to Make This:
- Start by selecting and editing your photos in a photo editing program on your computer.
- Then scan and save ephemera for your collage or find items matching your theme online by doing an image search.
- To create your collage, open a new document in a desktop publishing program like Microsoft Publisher, or use a free digital scrapbook site like Smilebox. Then set the size of your document to 8 ½ x 11 and the margins to .5 at left, right, top and bottom.
- Add your first image and adjust the size and arrange the photo as desired.
- Continue adding photos, re-sizing, and arranging the photos until you like their placement.
- Then begin adding ephemera; adjusting the size and arrangement.
- If you want you can add a text box or boxes.
- Add a background to your collage if you like.
- Save and print your collage on Computer Grafix according to the package directions.
- Trim the excess border from around the images.
- Distress edges of the trimmed collage sheet using Leather Ink applied using a Stylus &Tips.
- Center collage sheet on canvas and lightly pencil around the edges.
- The area outside the pencil lines is the portion of the canvas that will be inked in the following steps.
- Begin inking the edge of the canvas using Patina Ink applied using Stylus & Tips.
- Add areas of Stormy and Denim Inks around the edges of the canvas.
- Use Color Blender to blend edges of inks.
- Then use the Heat Gun to heat set the inks.
- Begin stamping design around edges of canvas using Mossy Ink.
- Use the Heat Gun again to set the inks.
- Continue adding other designs, heat settings after each.
- Distressed pattern using Stormy Ink.
- Begin removing the backing at the corner of the collage sheet.
- Tack a corner of the collage sheet to canvas, checking alignment before adhering the corner.
- Slowly remove backing smoothing the sheet as you go.
- Work your way slowly, smoothing sheet to avoid creases or air bubbles.
- Stamp swirls in Leather Ink to bring canvas and collage sheet together.
- Use the Heat Gun to heat set the swirls.
- Arrange Gypsy photo turns and mark placement with a pencil.
- Then punch holes in the marked areas.
- Insert the Gypsy brads to attach photo turns.
- Arrange and adhere buttons on the canvas.

