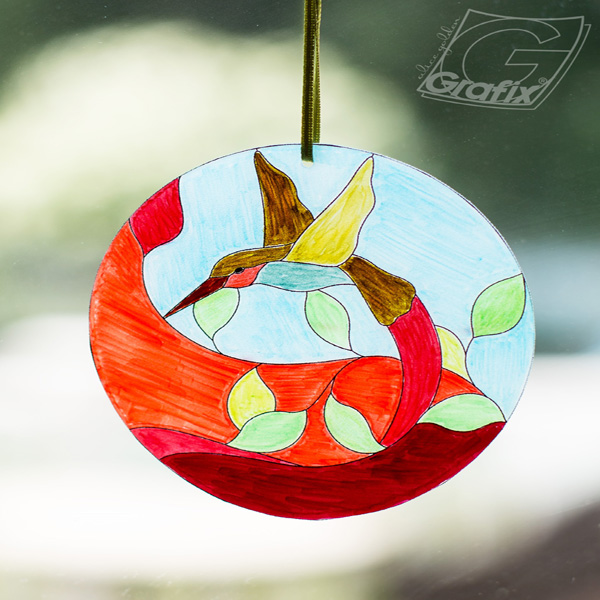
Faux Stained Glass Ornament
Project Description: Use translucent shrink film to easily create ornaments that look like stained glass. There are hundreds of free patterns available online – simply print onto shrink film, color with markers, trim, and bake. The ornament can be hung on the tree during the holidays and in a window as a year-round decoration.
Designed by: Alice Golden
Difficulty: Moderately Challenging
Materials:
- Grafix Clear Inkjet Printable Shrink Film
- Imagination International Copic Markers: YG03 Yellow Green, YG13 (Chartreuse), YG93 (Grayish Yellow), YG97 (Spanish Olive), G14 (Apple Green), B02 (Robin’s Egg Blue), BG72 (Ice Ocean), E29 (Burnt Umber), 100 (Black), R24 (Prawn), R35 (Coral), R37 (Carmine), R59 (Cardinal)
- Computer and inkjet printer
- Word Processing or Photo Editing software
- 2Peas Cross Eyed font, available for free from www.fontpalace.com
- Sheet pan, parchment paper, lightweight brownie or bread pan, and oven or heat tool
- Hole punch
- Scissors
Note: Colors will intensify when the shrink film is heated. Image of hummingbird – downloaded from http://www.delphiglass.com/stained-glass-patterns/bird-patterns/free-hummingbird-bevel-panel-pattern. There are hundreds of free designs available on the internet. Search for “free stained glass pattern” or create your own using software or a permanent marker.
Steps to Make This:
- Print the chosen pattern onto a piece of Clear Inkjet Shrink Film sized to fill the 8 ½” x 11” sheets. Note that baking will reduce the shrink film in size by at least half.
- Color the image with markers using one color per section. Unlike coloring with Copic markers on paper, there is no need to try and blend shades or add shadows. Color each section so that any visible lines left by the marker are all in the same direction. When baked, this gives the finished piece a subtle streaking in each section which mimics the look of vintage stained glass.
- Cut out with scissors and punch a hole in the top for the ribbon. Keep in mind that the hole will also shrink, so make it twice as large as the ribbon you want to use to hang the ornament.
- Follow manufacturer’s instructions to shrink the film using an oven or heat tool.
- Add the ribbon through the hole at the top of the ornament.
Tip: The combination of oven temperature and baking surface can produce varying results. Also, larger pieces can sometimes warp or become twisted during baking. To prevent this, try placing the shrink film on a cookie sheet between two layers of parchment paper. Place a lightweight brownie or bread pan on top to cover the shrink film. I also found that baking the piece at a lower temperature for a longer time worked best. This piece was baked at 300 degrees F for 10 minutes. When it comes out of the oven, keep the bread pan in place and cool for several minutes to help the piece stay as flat as possible.