Little Computer Grafix House Landscape
Project Description: Go from using Grafix Films for 2D artwork to using them for 3D artwork with this creative little house landscape design!
Designed by: Cheryl Holz
Difficulty: Moderately Challenging
Materials:
- Computer Grafix Clear Inkjet Film
- Computer Grafix Laser/Copier Film
- Grafix Artist-tac
- Grafix Opaque White Craft Plastic Film
- Block of Wood 2” x 4”
- Saw
- Sandpaper
- Drill
- Blow Torch
- Golden’s GAC 100
- Paintbrush
- Liquid Watercolors- use what you have on hand! Or FW ink Olive Green, Hydrus Raw Sienna, Ecoline number 665, and Marabu‘s Reseda Aqua ink.
- Credit Card
- Alcohol Inks your choice of colors
- Tag Board
- X-Acto Knife or Box Cutter
- Cutting Board
- Tag Board
- Pan Pastels
- Watercolor Marker
- Double-sided adhesive tape or Grafix Double Tack Mounting Film
- Small Brads or Nails
- Pushpin
- Hammer
Steps to Make This:
PREP WOOD BASE:
- Start by cutting a house shape pattern on the tag board.
- Use your pattern tag board to cut a shape out of wood trimmed to 2”x 4”.
- Sand all the edges and mark the center about a third of the way down. Then drill an angled hanging hole. TIP- Wrap a piece of painter’s tape around your drill bit for the level you want so you don’t accidentally saw all the way through.
- Next, use a blow torch to lightly scorch outside edges and back.
- Apply two coats of Golden GAC 100 to prevent surface-induced discoloration.
PAINT, PRINT, AND SELECT LAYERS:
- Drop your choice of liquid watercolors onto Computer Grafix Clear Inkjet Film.
- Use an old credit card to squeegee and move to paint around, dropping in water as needed. Leave some areas unpainted for imagery.
- On Computer Grafix Laser/Copier Film print out imagery on high contrast imagery.
- Arrange over top of the painted film, using the house pattern as a frame to crop and select which portions to work with.
- Form the bottom contrasting portion, use scraps from other alcohol ink paintings on Grafix Opaque White Craft Plastic Film.
- Using the house pattern to help visualize and arrange which portion of the painting and materials you want to include in your composition. Here, in addition to the alcohol ink painted the bottom portion, you can include another portion of the painted film, a strip of copper, and/or a piece of papyrus.
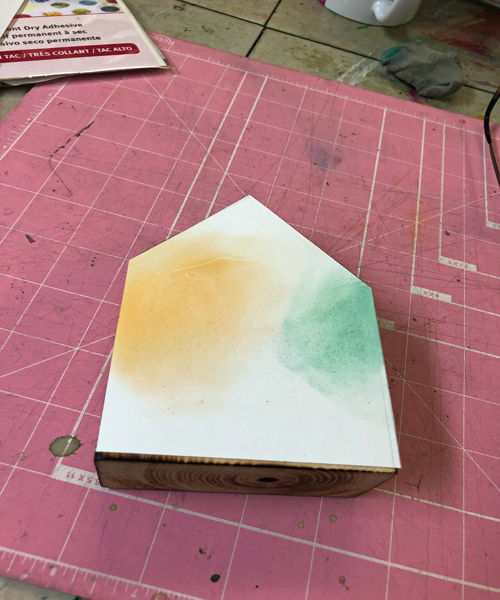
- To add a bit more color to the background, use some pan pastels on Opaque White Craft Plastic Film in the areas that needed it. Use the house pattern to cut to shape.
ASSEMBLE:
- Now assemble in order from the bottom up! Burnish Grafix Artist-tac onto the back of Opaque White Craft Plastic Film. TIP- I find it helpful to draw a pencil line over the used portions of the Artist-tac since it is hard to see what has been used and what has not.
- Burnish onto wooden house shape.
- Attach green poured film. For this layer, run a strip of double-sided adhesive tape or Grafix Mounting Film along the bottom portion that will be covered up later.
- Attach tree film by laying the entire sheet of film over the house shape, aligning the imagery where you want it to be placed.
- Using watercolor markers, mark the corners for easy alignment (they can be rubbed off later!). Put a line of double-sided adhesive on the lower portion that will be covered later.
- Hammer in small brads or nails at the corners, making sure the film is flat in between. TIP – starting a hole in the film with a pushpin makes it easier. Be sure and angle the nails inward so it won’t split the wood. You can also pre-drill if you’d like. Flip over and carefully trim off excess film.
- Apply the bottom layers with Artist-tac using the same process as you did for the Opaque White Craft Plastic Film.
- Flip over and trim off any excess hanging over the edge.
- Apply brads at corners and anywhere else you’d like.


