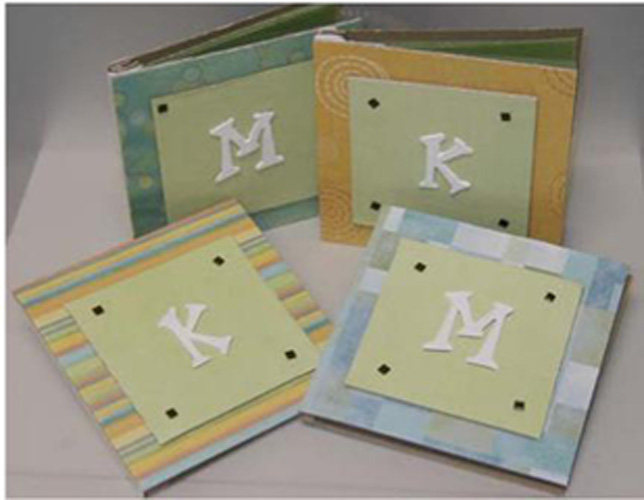
Monogrammed Chipboard Notebooks
Project Description: Create monogrammed Chipboard notebooks for friends and family with Grafix products.
Designed by: Grafix Designer
Difficulty: Moderately Challenging
Materials:
- Grafix Chipboard 12”x 12”
- Grafix Double Tack
- Grafix Vellum Sheets 12”x 12”
- Patterned Paper
- Brads
- Sizzix
- White Paint
- Glue
Steps to Make This:
- Cut Chipboard sheet in quarters, each piece should be 6”x 6”.
- Cover the face of 2 sheets with Double Tack.
- Apply patterned paper of your choice that has been cut to 7”x 7”.
- Fold the excess over the edges and secure with a dab of glue or Double Tack. Cut one of the remaining Chipboard sheets to 4”x4” and cover with paper using the same process.
- Paper this time should measure 5”x5”. Cut Vellum to 5.5”x6”.
- Stack sheets together neatly and place between the covers.
- The long edge of the Vellum should be horizontal. Cut thin strips of Chipboard approximately 1/2”x6” to make up the spine.
- Glue 2 strips together to make the top and 2 together to make the bottom.
- Place the Vellum Sheets between the spines making sure that the edges are flush.
- Hold the spine and Vellum together with a binder clip.
- Apply glue to the edge of the spine and Vellum to bind them together.
- Set aside to dry.
- Once dry, cut a piece of patterned paper that matches your cover to 1.5”x6”.
- Glue the paper to the Chipboard spine and wrap around and glue to the bottom of the spine on the reverse side.
- You are simply covering the unfinished edge of the bound pages.
- Now cut 2 more strips of paper to the same dimensions and fold them in half lengthwise.
- Place notebook cover, face down and lay it next to the bound pages of your notebook.
- The pages should be on the right.
- Glue the strip to the cover and the Chipboard spine so the fold is in between the two. Repeat for the back cover. This will allow the book to open and close.
- Punch a hole in each of the 4 corners of the small chipboard square and secure a brad in each hole.
- Die cut a letter for the cover of the book and paint white.
- When dry. Adhere to the center of the small square with glue.
- Then glue the small square to the center of the cover.

