Multi Layered Shadowbox
Project Description: Create your own shadowbox design with Grafix Clear Craft Plastic and Computer Grafix.
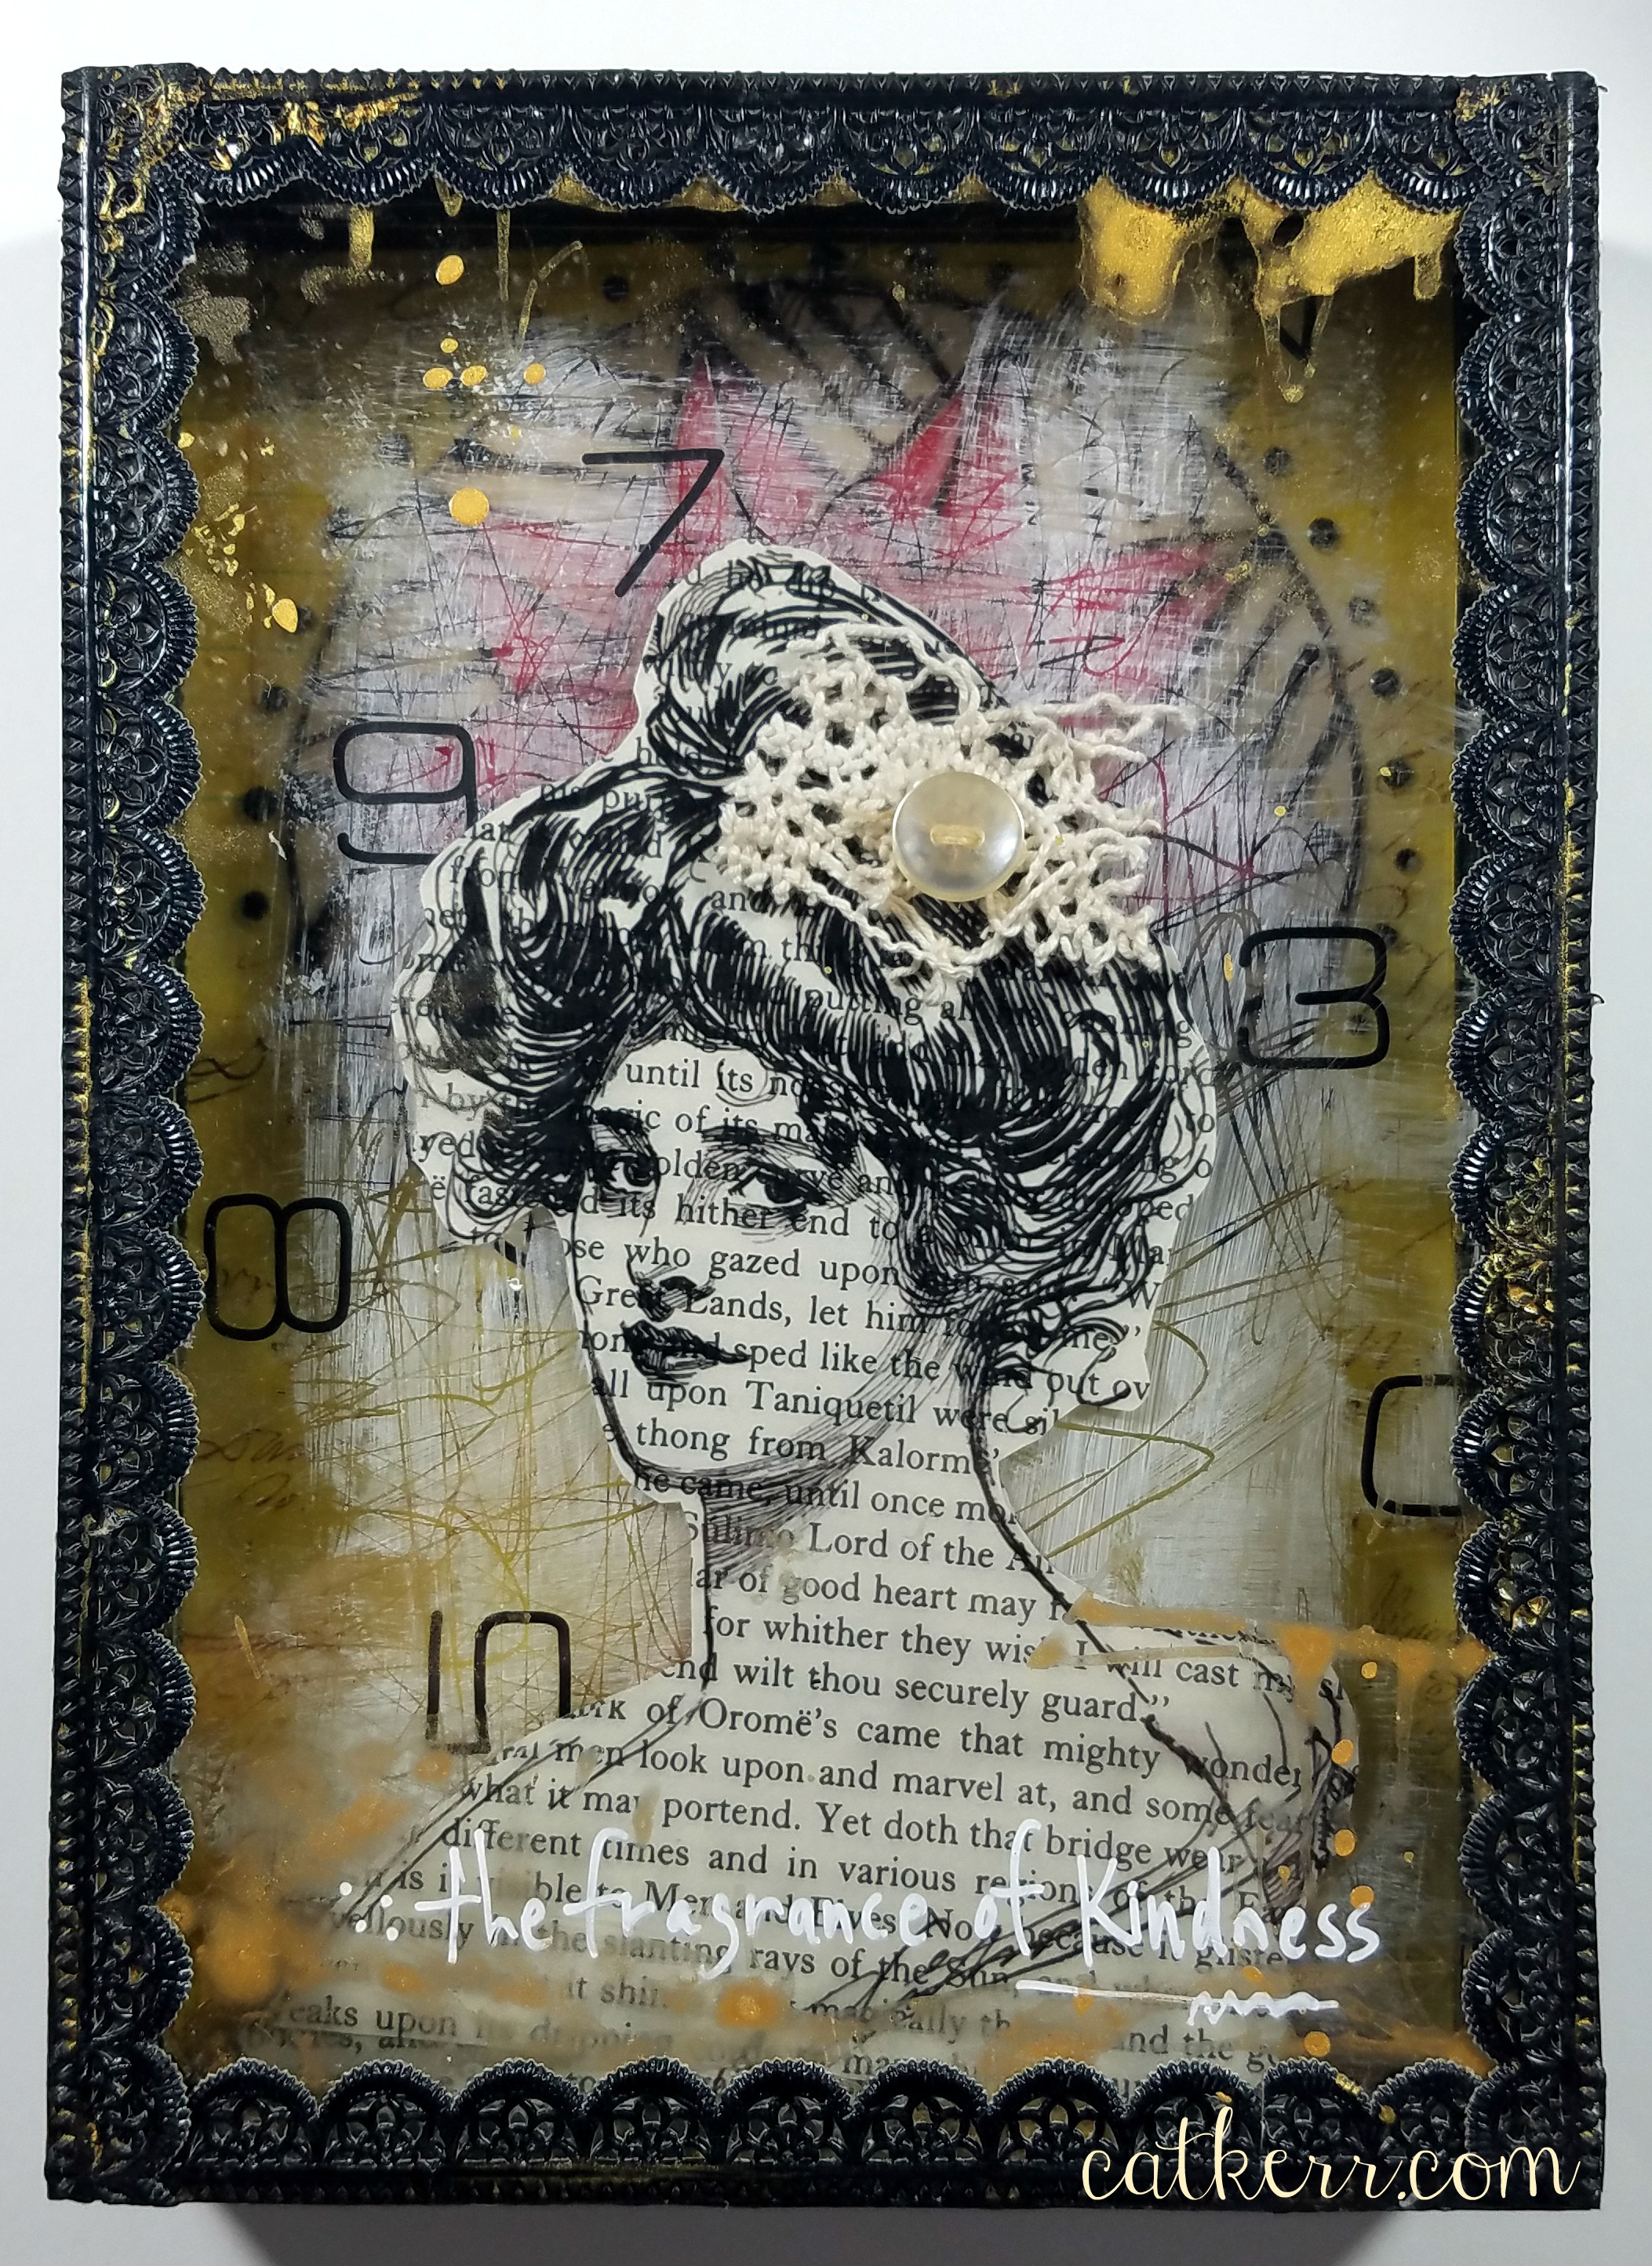


Designed by: Cat Kerr
Difficulty: Moderately Challenging
Materials:
- Grafix Clear Craft Plastic .020
- Computer Grafix
- Shadowbox Shrine
- Tacky Glue
- Black and White Gesso Marabu
- Computer Image
- Book Text
- Scissors
- Relief Paste by Marabu
- Porcelain Paint (Cherry and Yellow) by Marabu
- Number Rub-on
- Awl
- Assorted Brushes
- Popsicle sticks
- Water Cup
- Paper Towels
- Artist Paper by Somerset Studio
- Wood spacer blocks
- Gold Art Spray by Marabu
- Crochet Trim and button
- Dresden Trim in Black
- White Sharpie
Steps to Make This:
- Assemble and glue shadowbox shrine.
- Paint outside and inside walls with black gesso.
- Print an image on to Computer Grafix film.
- Apply an image to an old book paper and trim. Be mindful of copyright images.
- Cut three pieces of Grafix Clear Craft Plastic Film. Two sizes to fit inside the shadow box and one to fit on top of the shadow box.
- Layer One: Draw a circle design on to a piece of paper and then use it as a guide to paint on with Relief paste and let dry.
- Add Porcelain paint to the center of the circle using a Popsicle stick.
- Then using a brush applies the same color in another area of the circle and finish by using a cosmetic sponge to apply a second color and then let dry.
- Layer Two: Add white Gesso to another layer of Clear Craft Plastic Film.
- Do not cover the entire sheet; you want to still be able to see what will be underneath it.
- Then scrape the white gesso with an awl.
- Lastly, add some number rub-on. Be mindful of where your image will be. Using a glue stick add your image to this layer.
- Layer Three: The cover, add Gold Art Spray to the border of this layer. You can use a sponge through a stencil as well as adding splatters in random spots and then let dry.
- Assemble your box by first gluing a decorative Artist Paper on the bottom layer.
- Then glue on Layer one. Glue wood spacers in the spots that will be covered up by the image and then glue Layer Two.
- Add crochet trim and button if desired.
- Lastly, glue Layer Three to the top.
- Finish by gluing black Dresden to the border as well as writing a title to your piece.