UnWINE Cards with Distressed Embossing
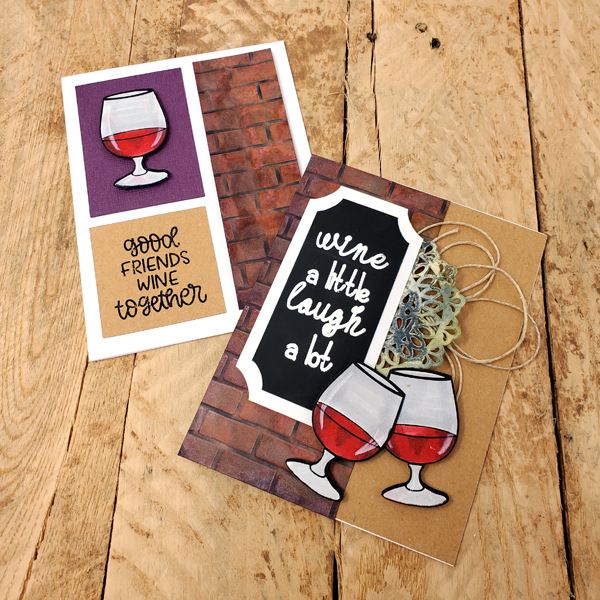
Project Description: Make your own unWINE embossed card with Grafix Opaque Black Craft Plastic Film and Artist-tac.
Designed by: Nicole Head- Cut n’ Edge Crafts
Difficulty: Moderately Challenging
Materials:
- Grafix Opaque Black Craft Plastic Film
- Grafix Artist-tac
- Paper Trimmer
- Alcohol inks in various colors including an opaque white
- Alcohol ink blending solution
- Alcohol ink applicator
- Manual Die Cutting Machine (for pressure embossing)
- Brick Pattern Embossing folder
- Sanding Block
- 110lb white cardstock
- Kraft or Natural Cardstock
- 2¾ x 5½ brick pattern panel
- Adhesive Foam Dots
- Ranger Emboss-It pen
- White Embossing Powder
- Heat Gun
- Ranger Alcohol Inks in Snow Cap, Butterscotch, and Silver
- Jute Twine
- Alcohol Markers, Blending Solution, and Blending Sponge
- White Colored Pencil
- Dark Purple Cardstock
- Black Craft Foam
- Printer
- Cricut Design Space Compatible Cutting Machine
- Wine and Friends Greeting Cards – Cricut Canvas
Steps to Make This:
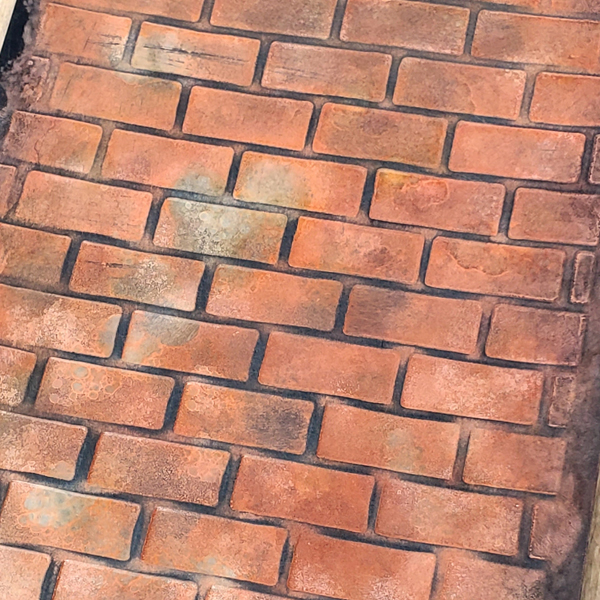
Distressed Embossing Technique
- Trim a sheet of the black film down to 4 1/2 in x 6 in.
- Use a brick pattern embossing folder to emboss the brick pattern grout side up on the black film. (Make sure that the side you want to add color is the same side that will have the raised grout lines. This is usually the back of the embossing folder).
• (Other patterns can also be used with this technique but it works best with thin line designs. Avoid patterns with large raised areas.) - Apply ink blending solution to an alcohol ink sponge applicator.
- Add a variety of alcohol ink colors to different sections of the sponge. Be sure to include a few drops of an opaque white mixture so that the ink shows up well on the black material.
- Bounce the sponge onto the embossed film, covering the entire design.
- Repeat the ink application process if more color variation is desired.
- With a sanding block, sand the ink layer off the grout lines until the pattern of the brick is visible.
- Allow the piece to dry.
- Use a paper trimmer to trim your finished piece into two sections. (For the cards shown in the example one 2¾ x 5½, and the other 1½ x 5).
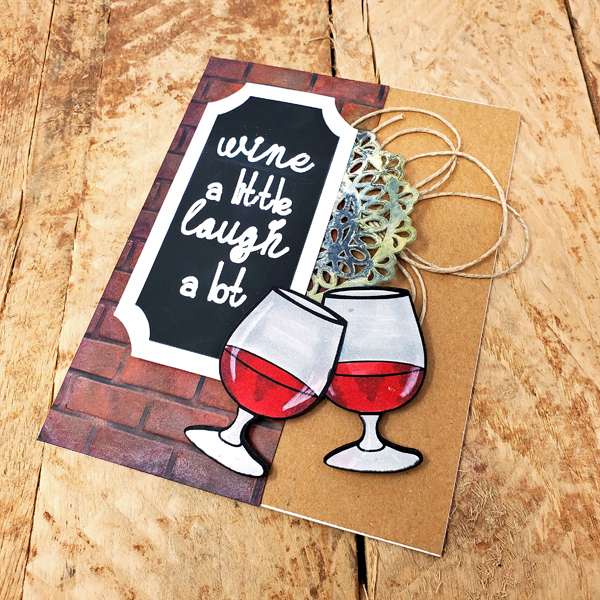
Wine a little, laugh a lot card
- Create two 4 ¼ x 5 ½ side folding note cards from white cardstock and set aside.
- Using the Cricut canvas file linked above or a paper trimmer, cut a piece of Kraft or natural colored cardstock to 4 ¼ x 5 ½ to create the card front.
- Adhere the brick pattern panel to the left side of the Kraft card front using Artist-tac.
- Use the canvas file to cut the black craft film sentiment strip and write the sentiment with embossing ink. (Alternatively, use a paper trimmer and circle die cut to cut the shape, and white the sentiment by hand with embossing ink).
- Cover the embossing ink with white embossing powder and set the powder with your heat gun.
- Use the canvas file to cut the white frame from white cardstock.
- Adhere the sentiment panel to the frame with Artist-tac.
- Use the canvas file to print and cut the wine glasses (save one wine glass for the second card).
- Color your wine glasses using alcohol markers, and use the white colored pencil to add a reflective highlight for dimension.
- Use the canvas file to cut out the doily shape from the black film.
- Use a blending sponge to apply alcohol ink to the doily.
- Cut a few loops of jute twine.
- Add the sentiment assembly to the card front using foam dots.
- Position the jute twine and doily behind the sentiment strip and adhere it to the card front with Artist-tac. A liquid adhesive can also be used if extra strength is needed.
- Then adhere the wine glasses to the card front with foam dots.
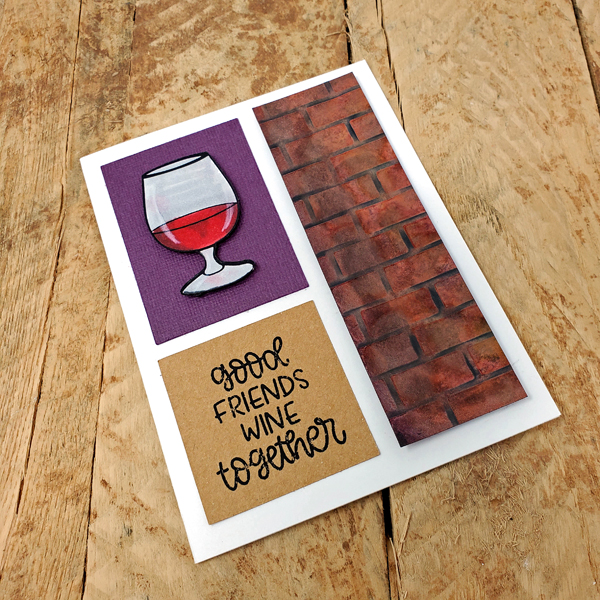
Good friends wine together card
- Use the canvas file or paper trimmer to cut a 2 x 2¾ rectangle from purple cardstock.
- Use the canvas file to print and cut the 2×2 sentiment strip from Kraft cardstock. (Alternatively, cut the sentiment strip square with a paper trimmer and handwrite the sentiment with a black marker.)
- Use black craft foam and Artist-tac to mount the brick pattern panel to the right side of a white notecard. Leave a ¼” margin.
- Use Artist-tac and black craft foam to pop mount the wine glass left over from the previous card to the purple panel.
- Mount the purple & wine glass panel to the upper left side of the card base with Artist-tac.
- Mount the sentiment strip to the lower right side of the card base with Artist-tac.


