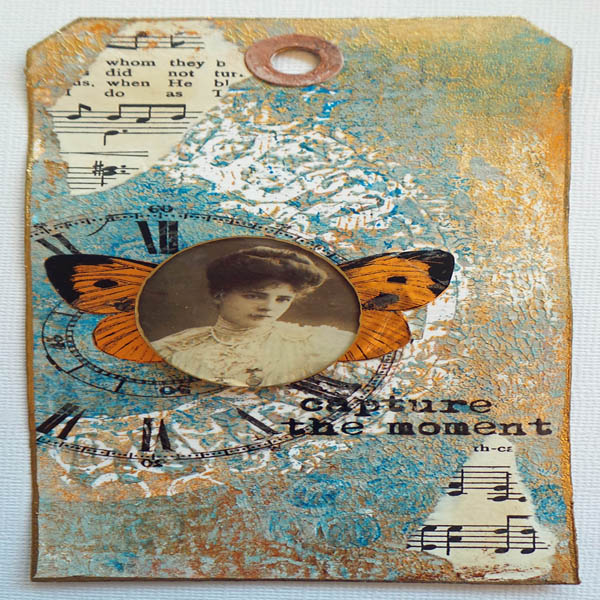
Vintage Tag
Project Description: A mixed media tag created using Grafix Impress Monoprinting Plates and Grafix Shrink Film.
Designed by: Katy Leitch
Difficulty: Moderately Challenging
Materials:
- Grafix Impress Monoprinting Plate 5×7”
- Grafix Shrink Film – Clear
- Rub-Onz Film
- Amsterdam Acrylic Paints
- Sakura Calligraphy Pen – Silver
- Oval die cutter
- Bubble wrap
- Craft Foil
- Printed vintage image
Steps to Make This:
- Add small blobs of Burnt Umber, Primary Cyan, Bronze and white paint onto the printing plate – use larger blobs of white than of the other colors. Brayer the paint so it’s well mixed but there are still areas of distinct color. Take a print onto a tag.
- Remix the paint with the brayer, press a piece of bubble wrap repeatedly into the paint – this will create a thin texture layer which won’t totally obscure the first. Take another print on the same tag.
- Clean the printing plate and add blobs of Deep Gold paint. Brayer to spread thinly, press with bubble wrap to add texture, and print again on the same tag. This paint is translucent so you’ll get a lovely semi-transparent paint layer.
- When dry, add a brown colored clock and words made with Rub-onz. Also, print a butterfly onto the rub-on film. Stick the butterfly to a piece of craft foil and trim off the excess. Add to the tag.
- Die cut an oval from shrink film and shrink using an oven or heat tool. Use Glossy Accents or similar clear drying glue to stick a vintage image to the reverse. When dry, trim then sand lightly to neaten the finish, before coloring the edges with a Sakura Calligraphy pen. Glue the cameo in place to finish.

